Pre Info:
This guide has been made with an Fon+ (2201), but should work with any other
Fonera Classic as well. Only limitation is that I have Problems with my
Jasager in Terms of SSIDs, there seems to be a Problem which hasn’t been
addressed by Digininja, but the Rest should work.
(Problem described here: http://hak5.org/forums/index.php?showtopic=13883 )
This guide should be quite useful and has been written by using guides and
stuff from this Forum, I just wrote it together and added my own experiances.
Maybe that will turn out as a good starting point and help some newbies.
This Guide ain’t perfect and if you think I could add some info - just write me,
I would be happy to provide more accurate Information to make life for new Jasager Friends easier!
Good Luck,
Yours, Nico
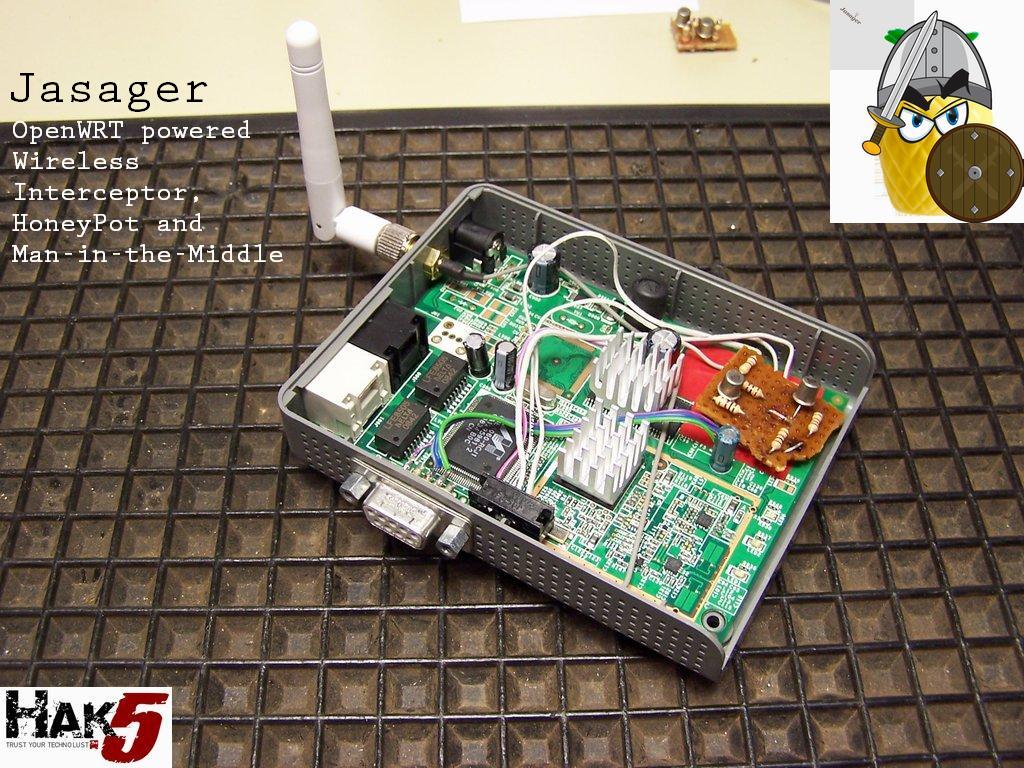
0.) Get it started! - Get the Jasager 1.0 Firmware from Digininja http://www.digininja.org/jasager/download.php - Built an Serial Adapter Its not that hard and you should built one - so you can recover an dead Fonera. I.e. http://www.dd-wrt.com/wiki/index.php/LaFonera_Hardware_Serial-Cable-Port I built that myself (“the ugly one”) and it works. Just to add two things: i) You need to wire RS232 TX to the RX of the Serial (S2) and RS232 RX to the TX (S3) of the Serial Connector (and 5 is the Ground) ii) If you use an Fon+ (2201), the Serial Connector on the Phone is like that:
ethernet port
c x VCC 3,3 V MEMORY
a x TX
s x RX CPU
e x GND
1.) Flashing the Fon+ to Jasager a) With Serial Port only: - Extract the two Firmware Files onto your PC - Connect to Serial (9600 baud, 8 Bit Data, 1 Stop Bit, No Software/Hardware Flow Control) - Power Up the Fonera and Press CTRL+C (within 2 Seconds) You end up in RedBoot>
Enter fconfig and press Enter until you come to the point Console Baud Rate. Change the 9600 to 115200. Press enter again till the end and accept the flash with y. Enter Reset and change the Serial Port settings to 115200 baud. Repower the Fonera and Press CTRL+C (within 2 Seconds) You end up in RedBoot>
Enter these Commands:
// Complete Kill of the Fonera Software:
fis init -f
// Download the Firmware Header and Root (fis can take about 20 Minutes!)
load -r -b %{FREEMEMLO} openwrt-atheros-vmlinux.lzma -m xmodem
fis create -e 0x80041000 -r 0x80041000 vmlinux.bin.17
load -r -b %{FREEMEMLO} openwrt-atheros-root.squashfs -m xmodem
fis create -l 0x6F0000 rootfs
// Configure Bootup, enter: fconfig
// Enter Bootup Script, enter these two lines and press Enter a third time
fis load -l vmlinux.bin.17
exec
// The complete Config should look like that (nothing else changed as the Bootup Script!)
RedBoot> fconfig
Run script at boot: true
Boot script:
Enter script, terminate with empty line
>> fis load -l vmlinux.bin.17
>> exec
>>
Boot script timeout (1000ms resolution): 2
Use BOOTP for network configuration: false
Gateway IP address:
Local IP address: 192.168.1.1
Local IP address mask: 255.255.255.0
Default server IP address: 192.168.1.254
Console baud rate: 9600
GDB connection port: 9000
Force console for special debug messages: false
Network debug at boot time: false
Update RedBoot non-volatile configuration - continue (y/n)? y
... Erase from 0xa87e0000-0xa87f0000: .
... Program from 0x80ff0000-0x81000000 at 0xa87e0000: .
RedBoot>
// Reboot, you're done with flashing!
reset
b) With Serial Port and Tftp Server:
- Extract the two Firmware Files onto an reachable tftp Server
- Connect the Wan Port to your Network
- Connect to Serial (9600 baud, 8 Bit Data, 1 Stop Bit, No Software/Hardware Flow Control)
- Power Up the Fonera and Press CTRL+C (within 2 Seconds)
- You end up in RedBoot>
Enter these Commands:
// First IP is the Fonera IP/Subnet, Second is the TFTPServer
ip_address -l 192.168.2.99/24 -h 192.168.2.8
// Complete Kill of the Fonera Software:
fis init -f
// Download the Firmware Header and Root (fis can take about 20 Minutes!)
load -r -b %{FREEMEMLO} openwrt-atheros-vmlinux.lzma
fis create -e 0x80041000 -r 0x80041000 vmlinux.bin.17
load -r -b %{FREEMEMLO} openwrt-atheros-root.squashfs
fis create -l 0x6F0000 rootfs
// Configure Bootup, enter:
fconfig
// Enter Bootup Script, enter these two lines and press Enter a third time
fis load -l vmlinux.bin.17
exec
// The complete Config should look like that (nothing else changed as the Bootup Script!)
RedBoot> fconfig
Run script at boot: true
Boot script:
Enter script, terminate with empty line
>> fis load -l vmlinux.bin.17
>> exec
>>
Boot script timeout (1000ms resolution): 2
Use BOOTP for network configuration: false
Gateway IP address: Local IP address: 192.168.1.1
Local IP address mask: 255.255.255.0
Default server IP address: 192.168.1.254
Console baud rate: 9600
GDB connection port: 9000
Force console for special debug messages: false
Network debug at boot time: false
Update RedBoot non-volatile configuration - continue (y/n)? y
... Erase from 0xa87e0000-0xa87f0000: .
... Program from 0x80ff0000-0x81000000 at 0xa87e0000: .
RedBoot>
// Reboot, you're done with flashing!
reset
c) Via Fon Flash:
- Get FonFlash (and install wpcap Drivers as well, are included in Wireshark)
- Start FonFlash - Select your Network Interface Card
- Select Rootfs (openwrt-atheros-root.squashfs)
- Select Kernel (openwrt-atheros-vmlinux.lzma)
- Press Flash Router now and Power Up the Fonera
- Takes approx. 20 Minutes
2.) Connect and Basic Settings
// telnet to 192.168.1.1 and change the root passwd to enable SSH.
telnet 192.168.1.1
passwd
ilovepineapples
ilovepineapples
3.) Fixing Webif You got two Webinterfaces on the Jasager. First the Karma/Jasager one at 192.168.1.1:1471, and Second the Webif/X-Wrt on 192.168.1.1. In Webif, you can change things like IP Adresses and watch a bunch of data. Easy configuration for your Fon+ if you’re not so used to the CLI in Linux. Now that you have changed the root password and therefor have access to ssh, you can use putty to connect to 192.168.1.1
a) Opkg
echo "src X-Wrt http://downloads.x-wrt.org/xwrt/kamikaze/8.09/atheros/packages" >> /etc/opkg.conf
opkg update
opkg remove -recursive luci-*
opkg update
opkg install webif
reboot
Manual
// Remove Previous Install
opkg -recursive remove haserl
// Download and move these files to the tmp directory on the fon using winSCP
haserl_0.9.24-1_mips.ipk
webif_0.3-4709_mips.ipk
webif-theme-xwrt_0.3-4709_all.ipk
// Install the files using putty.
opkg install haserl_0.9.24-1_mips.ipk
opkg install webif_0.3-4709_mips.ipk
opkg install webif-theme-xwrt_0.3-4709_all.ipk
4.) Enable Wireless
uci set wireless.wifi0.disabled=0
uci commit wireless && wifi
reboot
5.) Duplicate Ports (only on Fon+ 2201) http://www.frontiernet.net/~beakmyn/JasagerIntercept_Install.html
6.) There is no Step 6. Have fun!
(( http://hak5.org/forums/index.php?showtopic=14973 More Info on Jasager on http://www.digininja.org/jasager/ ))
Comments are disabled until you accept functional cookies.